Save Image with Pillow in Python
Pillow - Save image
To save an image in Python with Pillow library, you can use Image.save() method. By this way, you can save the image object as an image file in the local file system in required format.
In this tutorial, you will learn how to use Image.save() function to save an image object as an image file in your local file system.
Steps to save an image
The steps to save an image with Pillow are
- Import Image module from Pillow library.
- Assume that you have an image object,
img, where you have read the image and applied some transformations, or created it from a numpy array, or any such means. - Save this image object using Image.save() function. Pass the required file name. You may also specify a relative or absolute path. The extension given for the file name is used to format the image.
Examples
1. Save image created from a new Image object
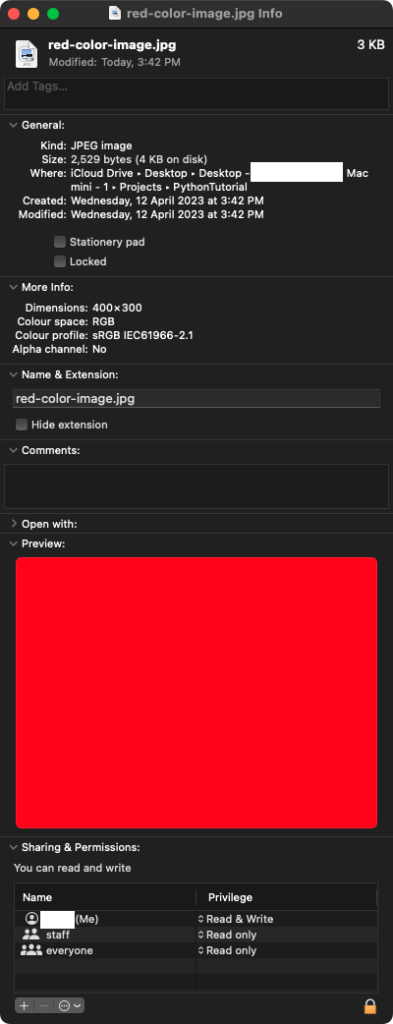
In the following example, we create a new Image object using PIL.Image.new() and then save this image using PIL.Image.save().
Python Program
from PIL import Image

# Create image of specific width and height
img  = Image.new(
        mode = "RGB",
        size = (400, 300),
        color = (255, 0, 0))

# Save the image
img.save("red-color-image.jpg")
red-color-image.jpg

Image file information
2. Save image that has been transformed/updated
In the following program, we read an image from local system, apply some transformations, and then save this resulting image object using using PIL.Image.save().
Python Program
from PIL import Image

# Read the input image
img = Image.open("test_image_house.jpg")

# Target image size
size = (200, 250)

# Scale the image
scaled_img = img.resize(size)

# Save the scaled image
scaled_img.save('scaled_image.jpg')
Summary
In this Python Pillow Tutorial, we learned how to save an image object as an image in our local file system, with the help of examples.