How to Apply Emboss Effect on image in Pillow in Python
Pillow - Embossing effect on image
To apply embossing effect on an image using Pillow library, you can use Image.filter() function with ImageFilter.EMBOSS kernel.
Steps to emboss an image
Follow these steps to apply embossing effect on a given image.
- Import Image, and ImageFilter modules from Pillow library.
- Read input image using
Image.open()function. - Call
filter()function on the read Image object and passImageFilter.EMBOSSas argument to the function. The function returns the embossed image as PIL.Image.Image object. - Save the returned image to required location using
Image.save()function.
Syntax of filter() function
The syntax of filter() function from PIL.Image module is
PIL.Image.filter(filter_kernel)| Parameter | Description |
|---|---|
filter_kernel | A filter kernel that applies to the given image. To apply embossing effect on this image, you can use ImageFilter.EMBOSS filter kernel. |
Returns
The function returns a PIL.Image.Image object.
Examples
1. Emboss given image
In the following example, we read an image test_image.jpg, apply embossing effect on this image using Image.filter() function, and save the embossed image as embossed_image.jpg.
Python Program
from PIL import Image, ImageFilter

# Open the image
image = Image.open("test_image.jpg")

# Emboss effect on the image
embossed_image = image.filter(ImageFilter.EMBOSS)

# Save the resulting image
embossed_image.save("embossed_image.jpg")
Original Image [test_image.jpg]

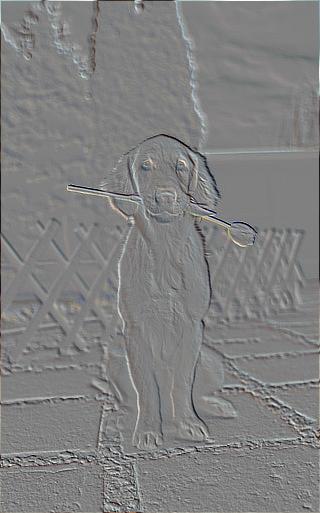
Resulting Image with EMBOSS filter [embossed_image.jpg]
Summary
In this Python Pillow Tutorial, we learned how to apply embossing effect on a given image using PIL.Image.filter() function, with the help of examples.