Tkinter Radiobutton
Tkinter Radiobutton Widget
Tkinter Radiobutton is a widget used to display a radio button in a Tkinter GUI application. And we can use a group of radio buttons to select a single option from a set of mutually exclusive options.
In the following GUI screenshot, there are three Radiobutton widgets.
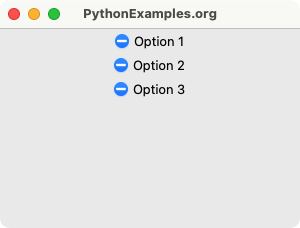
And user can select only one of these options.
And when user selects an option, we can get the selected option.
In this tutorial, you will learn how to create a set of Radiobutton widgets, in a Tk window, with specific text, value, variable, and a command function, and display it in a window.
Steps to create and display Radiobutton in Tkinter
Step 1
Import tkinter and create a window.
import tkinter as tk
window = tk.Tk()
Step 2
Create a Radiobutton widget using tkinter.Radiobutton class.
radio_button1 = tk.Radiobutton(window, text="Option 1", variable=radio_var, value="Option 1", command=on_select)The first argument to the Radiobutton() constructor specifies the master for the radio button widget. Since we are going to display the Label directly in the window, we pass window object created in the previous step.
The second argument is a named argument text which is displayed after the radio button symbol in the GUI.
The third argument is a named argument variable which is used to store the value of selected radio button. Declare this variable using tkinter.StringVar().
And finally, the fourth argument command, is the event handler function which is called when the radio button is selected. We have to define this event handler function as a Python function.
You can create as many Radiobutton widgets as required in a group, with a common variable and command values.
Step 3
Pack the Radiobutton widget in the parent widget using Radiobutton.pack() method.
radio_button1.pack()Step 4
Run the application.
window.mainloop()Example
In this example, we shall create three Radiobutton widgets in Tk window. When user selects an option, the command function is called, and we print the selected option to the standard output.
Program
import tkinter as tk

def on_select():
    selected_option = radio_var.get()
    print(f"Selected option: {selected_option}")

# Create the main window
window = tk.Tk()
window.geometry("300x200")
window.title("PythonExamples.org")

# Create a variable to hold the selected option
radio_var = tk.StringVar()

# Create Radiobuttons
radio_button1 = tk.Radiobutton(window, text="Option 1", variable=radio_var, value="Option 1", command=on_select)
radio_button2 = tk.Radiobutton(window, text="Option 2", variable=radio_var, value="Option 2", command=on_select)
radio_button3 = tk.Radiobutton(window, text="Option 3", variable=radio_var, value="Option 3", command=on_select)

# Pack the Radiobuttons
radio_button1.pack()
radio_button2.pack()
radio_button3.pack()

# Start the Tkinter event loop
window.mainloop()
Output
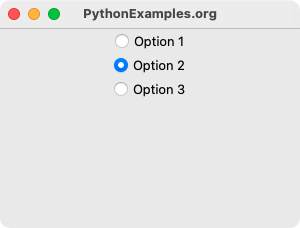
Output on MacOS
User selects "Option 2".
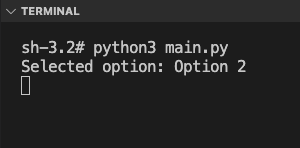
The command function executes, and prints the selected option in the standard output.
Summary
In this Python Tkinter tutorial, we learned how to create a Radiobutton widget and display it in the window, with examples.